Tuesday, June 24, 2014

Recycling? Upcycling? Hmmm?

Back in the day when the dinosaurs roamed and people travelled in covered wagons, I shopped the thrift stores for fashions to revamp.  I was just out of college and there was a lot of 60's and 70's stuff (my favorite decades) to be had. Nowadays, I just troll them for good sweaters to harvest great yarns. Being a mom of 2 boys who wear the same size, I am left with a lot of these...

 
Normally, I would just bag 'em up and drop 'em off at Goodwill.  This time I thought I would do something different.  I could cut 'em up and make a patchwork picnic blanket.  Seriously though, who was I kidding. I don't do picnics, don't like sitting in the grass, I don't hike.  Yeah, that would not work.  So, I went stash diving and came up with this.
 
 
The pattern- Vogue 1036 
I've had it a could of years now and it was time to cut it up and give it a whirl.
 
First off, the pattern is broad shouldered and looks like it was designed to have shoulder pads (hello the 80's called and they want their pads back).  I had to take it in 2" to bring it to my real shoulders then, I pushed on.  I opened pant legs, and place pattern pieces on various washes.  I sewed, I topstitched,  I pressed, I hammered.  Finally the pay off!   Don dona don....


THE FRONT
 
I opted for a center front metal zipper instead of snaps. 


 A CLOSER LOOK
 
I'm not convinced that I like that light wash strip in the front or at the bottom hem.  I'm thinking of dyeing the whole jacket.  Still debating, though.
 

THE SLEEVES
 
My favorite part of the whole jacket  ; )


THE BACK 
 
Um, I like that I used the outseam of the jeans for the sleeves.
 
THE VERDICT: All in all, it was really a fun project.  I'm most proud of not using any new fabrics. Now, the jacket languishes in the closet till the fall.  I can see it now, a black turtleneck, plaid A-line skirt and black leather boots.  Ooooh, it can come fast enough!
 

Friday, June 20, 2014

Do you bind?


I have really come to love making and using double fold bias binding. I bought these at the fabric store. There are all sorts of tutorials on Youtube on how to prepare your fabric and cut the strips.  I personally prefer the continuous method. The bias was made with the 3/4" maker finishing at 3/8".


 I recycled a cereal box (4pcs- 5"x7") to wind up and store the freshly pressed tape.


#1- Burlap placemats:  I cut up left over burlap from a project.  I was going to leave the edges raw, but they would fall apart when laundered.  Bias binding enclosed the edges and gave them a clean, casual appearance.


1. Fashionista nightie:
 
 Fabric: poly/cotton blend. I just cut it from an old nightie she had and made it a little bigger. 
 

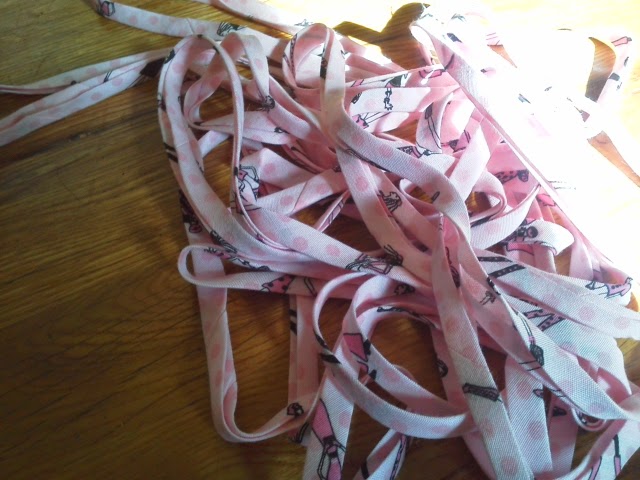
 1/4" binding at the neckline and
 
1/2" binding made up the straps and encased the raw underarm edge.
 
This will be good for next summer as well.
 

Thursday, June 19, 2014

Summertime!

It's been a minute...but I'm baaack!

Summer time always gives me a nudge into the sewing direction.  I lose my knitting  mojo and head to the fabric stash which, by the by is no less replete with vision of spectaculosity.  In this my 6th month of stash diet and stash reduction, I've prepared these...


All washed and read to be cut up into summer lovelies for Peanut formerly known as Mochantas
My "mini me" has already decided what will be what...silly girl!

Wednesday, February 05, 2014

Monday, August 13, 2012

Peplum Love


We all know how fashions always comes back....the 80's icon is back, baby!  I'm seeing peplums everywhere!  I loved them back in the day.  They are flattering on all figure types, hiding that tummy, accentuating the waist...how can you go wrong?  Welcome back!

Wednesday, August 08, 2012

Try something new!

 A friend gave me 5 t-shirts and a challenge to make some bags for her... I've heard about the making yarn from t-shirts before but never tried it. I went on YT and watched GLAMPYRE do her thing. So I went from this...


to this
I folded the shirt in almost in half (as you can see at the top portion of the picture).  I made 3/4" wide slices through the top fold but not the lower fold.

 when I reached the armholes and sleeves I just cut through top and bottom layer (all the way through the bottom fold)


after a few more cuts, stretching and winding up the "yarn", I was able to make 3 bags. 


TADA!!!
Simple knitted bag with garter stitch detail at the top,
beaded handles and snap closure.


Pleated clutch with zipper closure and sparkly button


Crocheted bag with leather inserts and magnetic closure.
Faux bamboo handles

The top 2 are knitted on size 13 needles, and the bottom one is crocheted with a K ndl.  There is no pattern, I just made it up as I went along. It went lickety split, I did them in a couple of days. Hand sewing the lining was the "hardest" part.
I was neat going out of my comfort zone and stretching myself a bit.  Would I do it again?  Hmm... ***glancing over at ever expanding stash***....

Monday, February 20, 2012

Lots of knitting going on and pictures are coming.  But have you heard of MySewingCircle?  It's a site like Ravelry but for sewists!  Yeah, I know!!!  Sqeeee!!!  I'm already on!!!